How to Wear: Statement Necklaces

Everyone has a show-stopping necklace (or two) in their possession. While picking out a statement necklace is easy – it’s colorful, impressive, and a quick buy – styling it isn’t always a walk in the park. Statement necklaces are a great way to add dimension and glamour into an outfit, whether it’s for a formal event, an average work day, or an errand-running afternoon. Follow these five dos and don’ts to effortlessly incorporate any statement necklace into your ensemble regardless of occasion.

Don’t   /    Do

Screen Shot 2015-03-12 at 2.01.29 PM   6c7968d935f887c18991157aed2ffd80

Tip 1: Neckline. For a more sophisticated look, pair a statement necklace with an unembellished neckline. In the left-handed picture, you’ll see the neckline is scalloped, which interferes and distracts from the texture and shape of the necklace.

bc27f746be9385cc6423429d35366465   Screen Shot 2015-03-12 at 2.07.40 PM

Tip 2: Length. It’s easy to look like you’re trying too hard when wearing a statement necklace. Avoid this pitfall by pairing a bold necklace with shirt that complements its length. In most cases, a bib-shaped necklace should be worn as tight to the neck as possible so the chain can’t be seen. The neckline of the shirt shouldn’t interfere with the necklace either. So either wear a shirt that is cut high enough that the neckline isn’t seen but is covered by the necklace, or is low enough so the necklace doesn’t touch it at all.

2d231317618c985c6f0c98f17c23c304 9491c8b3486b3dc4d49cc69b1000d875

Tip 3: Additional accessories. I’m all for over-accessorizing. I think the “take one accessory off before you leave the house” rule is complete rubbish. That being said, when wearing a statement necklace you need to accessorize sparingly. In the left hand picture, the pearl necklace is interrupted by the belt twist happening just a few inches below. Furthermore, if you’re going to wear a fun print and a statement necklace together, everything else should remain very simple. While the model on the right has accessorized with a statement necklace, a watch, and many rings, they all have a similar texture, are placed far enough apart, and interact on a blank black canvas.

3e51e9bde9bac56941fea3521aef8ed6 92328aefd3ded7afbc9a9e10bfd45339

Tip 4: Collared shirts. If you’re wearing a collared shirt with a statement necklace, it should be placed outside the collar (i.e. not touching your skin). Secondly, tighten the necklace so that it hangs directly below the where you’ve buttoned it, not hanging awkwardly low and not so tight that it messes with the structure of the collar.

57ae6a66814dcc2d4f9cb5703416e3d1 bd6feda1f973305aa1ecba8ee5ed446a

Tip 5: Layer. It pains me to see people who wear statement necklaces, yet dress like they are afraid of them. If you’re going to be bold enough to wear a statement necklace, the rest of your outfit should follow suit. This doesn’t mean you should over-accessorize, but to allow a statement necklace to garner the attention it deserves, pair it with an outfit that combines textures, colors and shapes.

Recipe of the Month: Blood Orange Meringue Tart

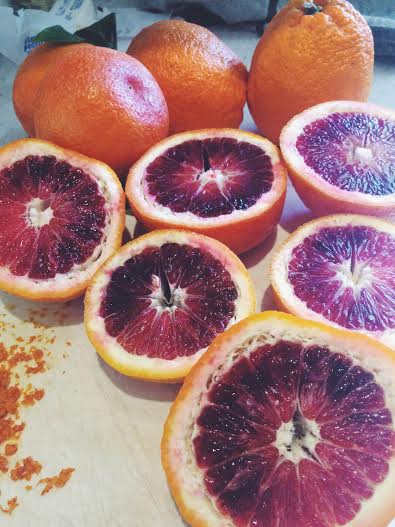
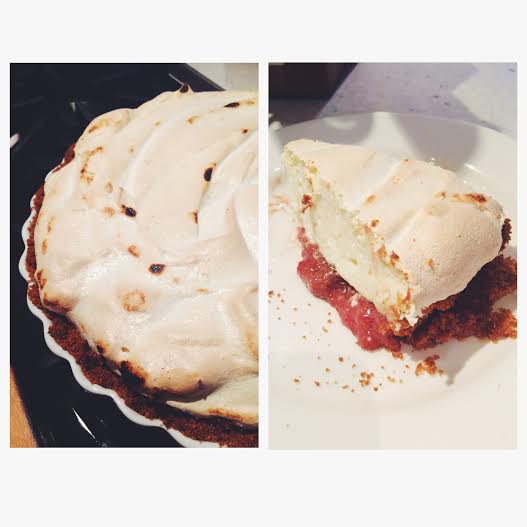
Between working full time and planning and hosting Food With Friends, I don’t get to play in the kitchen as much as I would like. However, this weekend, I couldn’t resist the blood oranges at the farmer’s market. The beautiful winter citrus plus an insatiable love of meringue, resulted in this dessert that combines so many of my favorite flavors.

Blood Orange Meringue Tart

Serves: 8-10

Processed with VSCOcam with f2 preset

Ingredients

Crust:

12 Graham Crackers

5 tablespoons butter, melted

¼ cup granulated sugar

1/8 teaspoon salt

2 teaspoons candied ginger, finely chopped

Filling:

1 cup blood orange juice

½ a lime

4 egg yolks (Save the whites)

4 tablespoons butter

¾ cup granulated sugar

Meringue:

4 eggs whites

1 ½ cups granulated sugar

½ teaspoon cream of tartar

2 teaspoons orange zest

What you’ll need:

Cuisinart

Mixer (handheld or standup – or a whisk and some highly developed biceps)

9 inch pie or tart shell

Steps

Preheat the oven to 350 degrees

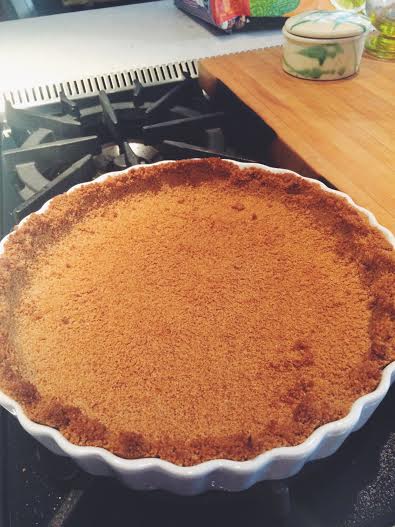
  1. To make the crust: combine the graham crackers, sugar, salt and candied ginger in the Cuisinart and pulse until you have a fine crumb. Add the melted butter and continue to pulse until the butter is fully incorporated and the mixture clumps together between your fingers.
  2. Pour the crumb mixture into a pie or tart shell and use the back of a dinner spoon to press it evenly into the pan. Bake for about 12 minutes, until the edges begin to brown.

Processed with VSCOcam with f2 preset

  1. To make the filling: zest two of the oranges and set it aside for the meringue. Juice the oranges and lime, making sure to taste for sweetness and acidity. Add the juices to a small pot set over a medium heat and reduce by half, about 7-10 minutes.
  2. In a small bowl, combine the egg yolks and sugar, whisking them together until they are pale yellow and airy.
  3. Working quickly, so the yolks don’t cook, add the reduced juice to the egg and sugar mixture, whisking until combined. Return the mixture to the small pot and stir in the butter.
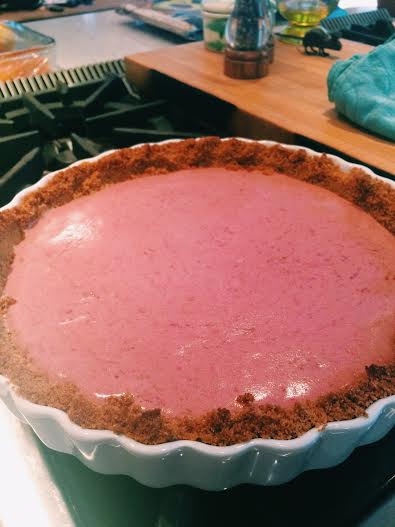
  4. Over a medium-low heat, cook the blood orange curd, stirring constantly, until it’s thickened and evenly coats the back of a spoon, about 3-5 minutes. Once its thickened, remove from the heat and let it cool for about 15 minutes.
  5. Pour the curd into the bottom of your tart shell and bake for about 12 minutes, until it begins to set. Take it out of the oven and let it cool.

Processed with VSCOcam with c1 preset

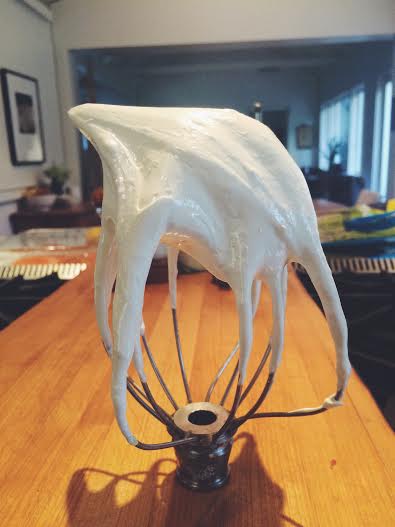
  1. To make the meringue: Put the egg whites in a bowl and mix on a high speed for about 7 minutes, until the whites are thick and frothy. Add the cream of tartar and slowly incorporate the granulated sugar, continuing to mix for another 5 or so minutes. Once you’ve got your meringue to a stiff peak, add your orange zest and whisk to combine.

Processed with VSCOcam with f2 preset

  1. Pile the meringue on top of the blood orange curd, using a spatula to smooth the top.
  2. Place the pie back in the over for another 10-12 minutes, just until the meringue is slightly golden.
  3. Remove from the oven and let it cool before serving.

Processed with VSCOcam with f2 preset

Written by Carter Goffigon

unnamed